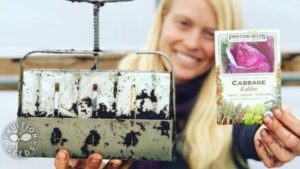
Here are those amazing soil blockers as well as mini-soil blockers, Friends!
Here is our soil blocker kit, including the inserts that integrate them.
And the ideal potting mix for them…
…and the heat mats they optimize 🙂
From Rise & Shine: Starting Seeds with Ease available here:
Soil Blocks in 5 Easy Steps
The Dutch have been developing modern soil blocking for nearly a century. Planting seeds into cubes of soil was documented 2,000 years ago in Central America, as well.
I love soil blocks for the remarkable health of transplants grown in them compared to their cousins grown in cell trays. And they’re fun to make! If you take care of your soil blockers, they will last decades if not generations.
Brilliantly, soil is both the container and the growing medium of a soil block. Your seedlings will naturally air-prune themselves in soil blocks, maximizing their soil volume (which is much more than a cell in a tray could offer) and never become root-bound. Soil blocking is my favorite way to grow seedlings.
There are two main sizes of soil blockers that are ideal for home gardeners. You’ll find them here.
Mini-blockers create 20 1/2-inch soil blocks, which are perfect for germinating seeds. Minis help maximize the limited and precious space on your heat mat, especially for seeds that take longer to germinate like lavender, parsley, thyme and oregano. Because minis are so much smaller than large blocks, seeds are that much closer to the heat mat, which hastens germination. Also, minis pot up into your large blocks with simple plugs (“mini-inserts”) that attach to the large soil blocker, making perfect indentations for your minis to nest into.
Grow Like a Pro: Once seeds in your minis have germinated, pot them up pronto!
Best Seeds to Start in Your Mini-Blocker
Any solanaceous crops: tomato, eggplant, pepper, tomatillo, ground cherry
Tiny-seeded herbs with moderate to long days to germination: oregano, thyme, parsley, shiso, basil, natives like milkweed
Tiny-seeded flowers with long days to germination: lavender, nigella, rudbeckia,
Our large blockers make 2-inch soil blocks. Other sizes are available, though we find this size is ideal for most seeds. Many seeds we sow directly into these large blocks. These large blocks pot up marvelously into 4-inch containers.
Soil Blocks in 5 Easy Steps
Materials
– Seed starting/potting mix (organic, compost-based mix grows the healthiest seedlings) (Note: standard potting mix may have particles too large and inappropriate nutrients for seedlings, so be sure to get specific seed starting mix. Also, mix with too much vermiculite/perlite often results in crumbling blocks, high compost content results in dense, sturdy blocks.)
– Tub to easily contain potting mix
– Warm water (tap is perfect)
– Seeds (organic seeds grow the most abundance)
– Soil blocker (we use a mini and 2-inch blocker)
– Mini inserts (so your mini soil blocks will perfectly nest in the large blocks)
– Small pan of water (to rinse your blockers in)
– Bottom trays
To make Soil Blocks:
- Before you begin, gather your materials from the list above.
- In a sizable tub with a flat bottom, moisten your potting mix with warm water. Potting mix for soil blocks is wetter than for cell trays. A squeezed handful of mix should not drip, but nearly. Your sense of proportion will come with experience. 🙂
Grow Like a Pro: I use warm water to moisten my potting mix. It makes soil blocking more comfortable and fun 🙂
- Fill your soil blockers! Fill your soil blocker by pressing it into the potting mix, pushing down several times and twisting a bit, rocking from side to side. Your goal is to have solid blocks of soil. I often hand-pack the soil into each block to be sure there are no remaining air pockets. (This is especially important if your large soil blocker has the mini inserts attached, because the top of the block has a thinner, more fragile edge.) Once you’re confident your blocks are packed tight, scrape any excess soil on the bottom off with the your hand, a butter knife or the edge of your container.
Grow Like a Pro: Pack your soil blocker as densely as possible. The upper corners of the block are the most prone to crumbling. Use your fingers to pack your potting mix deep into the soil blocker before the blocker is mostly full. This is especially critical when using the mini-inserts, whose edges are narrower and thus more fragile.
- Place your blocker on your bottom tray. Release your blocks by pressing the spring-loaded handle and raising the blocker in a smooth, even motion. Voila! (If your blocks are not solid, toss them back into your tub of potting mix and continue on. They will be better next time!) Our soil blocking demonstrations on YouTube will help you make great soil blocks, as well.
Grow Like a Pro: Practice makes perfect. Soil blocks are no exception. Your first soil blocks will likely make you laugh. They’ll slump, perhaps crumble. Throw them back and make more! You may learn the hard way that standing ability alone doesn’t prove their density; blocks that aren’t dense enough will slump and crumble in the following weeks. Luckily, soil blocking is fun and forgiving 🙂
- Rinse your soil blocker between each set of blocks. To make consistently perfect soil blocks (and for the biggest payoff from your efforts), your soil needs clean contact with the blocker.


