Happy Spring, Friends!
With Memorial Day just around the corner, it’s soon time to tuck your transplants in the ground. Whether you’re planting them in raised beds, a large garden or in a container on your deck, here are five tips to boost their health and, as a result, the beauty and abundance surrounding you this season.
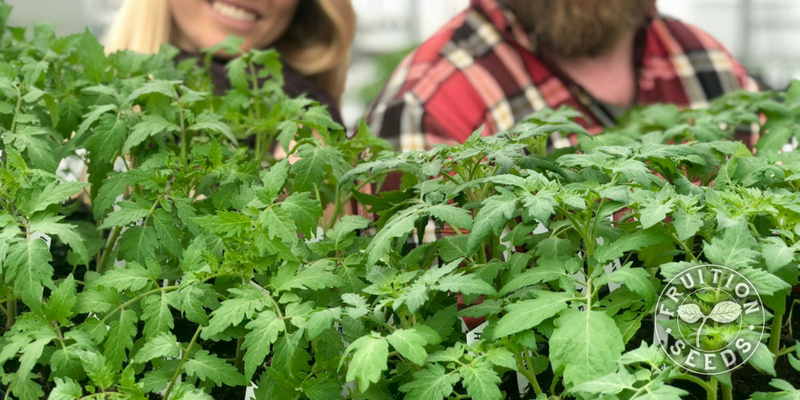
We grow thousands of certified organic transplants for Fruition’s Garden Store each spring.
First, know this: Healthy, unstressed transplants grow the greatest abundance. Healthy transplants are short and stout, deep green and not root bound. See the gallery at the bottom for pictures worth a thousand words.
Without further ado:
1. Hardening Off
Transplants, whether you grow them or buy them, are rather sensitive little beings.
Grown indoors with seed-starting soil mix and a roof over their heads, your transplants have lived their lives in conditions very different from those in your garden. They’ve never experienced gusting winds, falling rain, fluctuating temperatures or real soil much less rocks. Acclimating them, or ‘hardening them off,’ is essential.
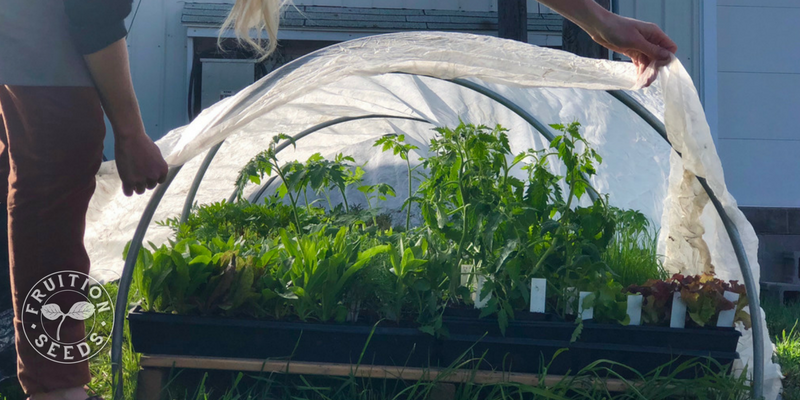
To harden plants off, bring them outside 5-7 days before transplanting them into your garden. Their soft stems become stronger with each passing breeze. They grow accustomed to direct sunlight, to the sensation of raindrops, to the shifting temperatures of day and night. What if it freezes? When is too early? Read on.
2. Timing is Everything
Here in the Northeast, we can transplant hardened off, cold-hardy kale, broccoli, chard, spinach and onion six weeks before, and sometimes more, Memorial Day. The list is much longer, but some of my other favorite cold-hardy crops you can transplant early include kohlrabi, arugula, spinach, cold-tolerant lettuces (Winter Density is exceptional), and scallions.
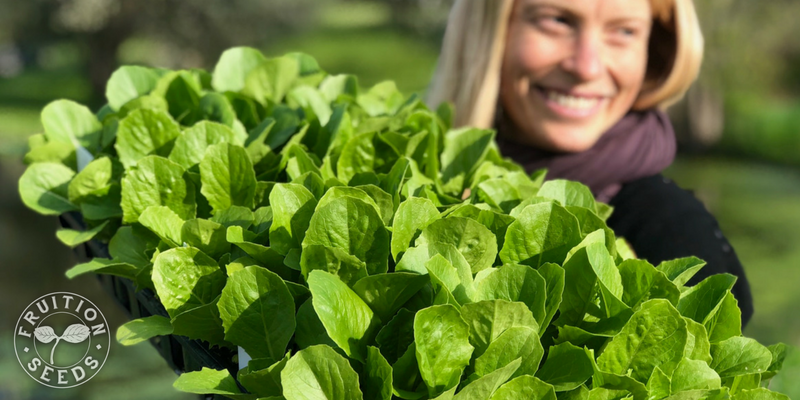
This Plato II romaine lettuce is surprisingly cold-hardy in spring and bolt-resistant in summer heat.
For such cold-hardy transplants, experiencing freezing temperatures is essential. If you plan on using row cover in the field, use row cover at night. Otherwise, know you’re acclimating them to the conditions they’ll experience in the field and any sugar-coating may result in less abundant harvests. Tough love is definitely applicable for your cold-hardy seedlings! Once they’re large enough (3+ true leaves), they can be hardened off and transplanted 6-8 weeks before your final frost. For early plantings, a full week of hardening off will help your seedlings acclimate better and produce all the more. (For us, in Zone 5 here in the Finger Lakes, Memorial Day is a consistent final frost date. More on frost here.)
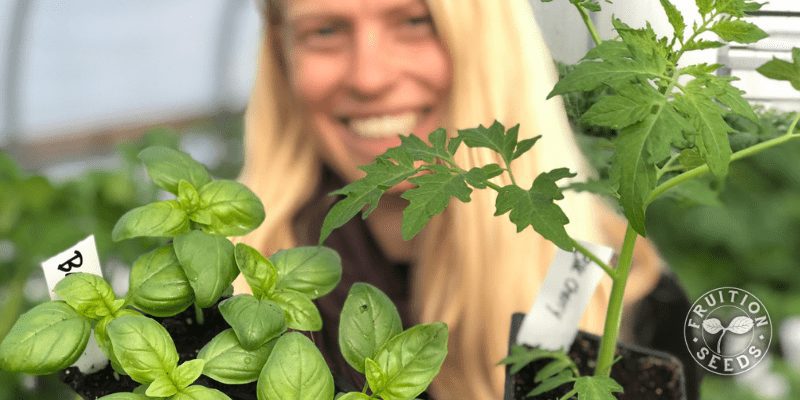
Tomatoes and basil prefer to be planted once nights are 50°F or higher.
For frost-sensitive transplants like tomato, basil and zinnia, it’s essential to transplant them after your final frost. Keep in mind that soil takes longer to warm than air, so resist transplanting til nights are consistently above 50°F for optimum plant growth. Bring them out to harden off before Memorial Day, by all means; just be sure to bring in your tropical vegetables (tomato, pepper, eggplant, tomatillo, ground cherry) if night temperatures may fall below 50°F. Pepper and eggplant, especially, are prone to pouting if they experience such cool weather, even briefly. Less sensitive plants like cosmos and parsley won’t mind if they’re out in a night less than 50, as long as it’s above freezing.
If you haven’t already, dive into our Transplant Chart. It’s one of the many resources you’ll find in our 50-page book, Rise & Shine: Starting Seeds with Ease. You’ll learn, among much else, when to start seeds indoors, when you can harden them off and when, finally, you can transplant.
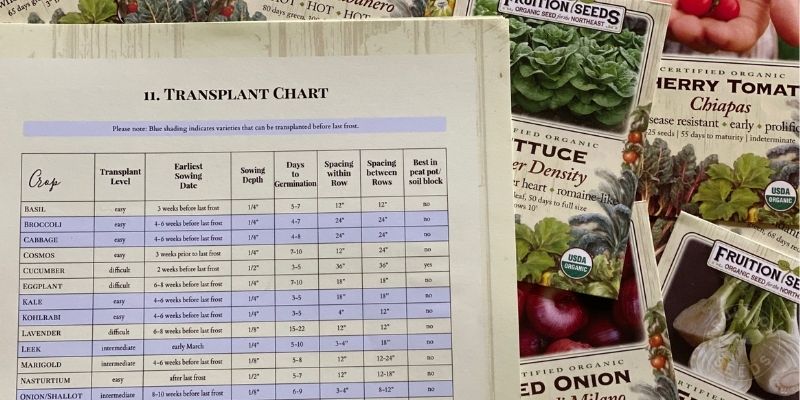
Rise & Shine: Starting Seeds with Ease is full of great resources, including this Transplant Chart.
Inquisitive, eager friends: It may seem counter-intuitive, but earlier planting and transplanting doesn’t guarantee an earlier or more abundant harvest. Err on the side of younger, less stressed plants. Every time. I don’t always take my own advice. And then I remember why.
Another aspect of timing: Any time you can plant just before a light rain, letting the rain gently soak in around the roots and surrounding soil, do it. Because that, friends, is the dream.
3. Fish Emulsion Makes All the Difference
It’s really important to water your seedlings before transplanting them, encouraging their roots and accompanying soil to stay intact through the transplanting process. This also ensures that their roots will grow quickly, exploring new soil and accessing new nutrients.
And yes, any water will do.
But.
We always water our seedlings, just before transplanting, with diluted fish emulsion. It’s a boost of immediately available macro- and micro-nutrients to inspire optimal, balanced growth. Our plants love it for lunch and we love it for up-cycling the by-catch of the Northeast fishing industry. We share it with you here!
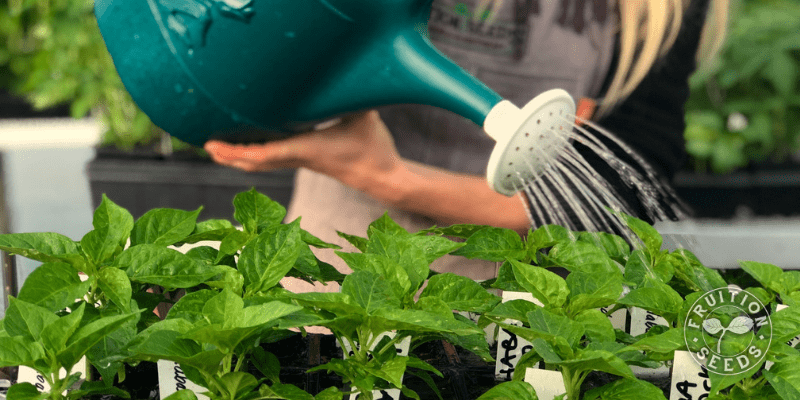
Overhead watering helps strengthen young, tender stems.
Fish emulsion itself is a brown, very concentrated liquid that you’ll need to dilute to use. One ounce to one gallon is the proportion to apply. And know that, in this case, more is not more: more concentrated dilutions may ‘burn’ your plants and will be more likely to attract raccoons and other scavengers to your garden. At the proper dilution, you’ll have no unwelcome garden visitors and your plants will be gloriously healthy, ready to surround you with abundance.
If compost or worm castings are more easily available for you than fish emulsion, by all means make a tea to water your seedlings just prior to transplanting. Your plants will dance about the difference.
4. Break Up the Root-Bound
The key here is to avoid root-bound seedlings in every way you can. Root-bound seedlings are stressed seedlings; stressed plants are less abundant and less delicious. The best ways to avoid root-bound seedlings are:
a) Don’t start seeds too early.
b) Sow seeds with abundant nutrient-rich soil (egg cartons are waaaaay too small to hold enough soil)
c) Sow seeds in soil blocks or peat pots so they naturally air-prune rather than become root-bound
d) Transplant or pot up your seedlings when they’re young, before they’re root bound
Try as we might, we always seem to leave some seedlings in their cells a little too long and they become root-bound. As we transplant those, we gently break up their roots, ever so slightly, encouraging them to explore the world outside their little box of roots once they’re planted.
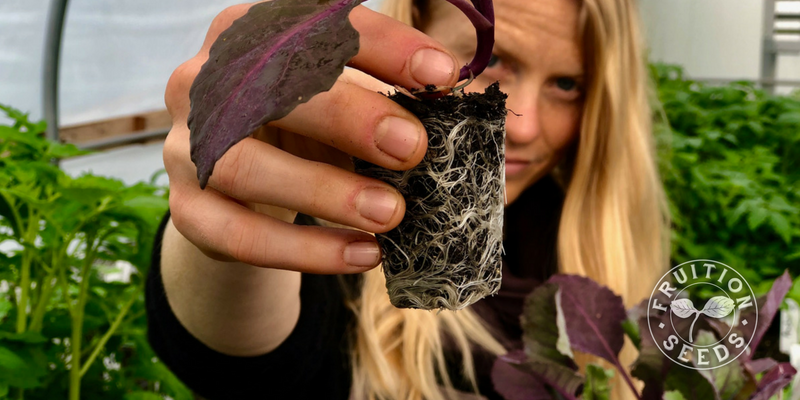
Root-bound plants are stressed plants and stressed plants grow less abundance.
5. Great Root to Soil Contact
This final step is so vital. Once you’ve gone through all this work to grow your gorgeous seedlings, the icing on the cake is ensuring great root to soil contact. This helps them access more nutrients more quickly, encouraging quick, healthy growth and thus increasing your abundance. As you bury the roots of your seedling, take care to not bury any of the stem, which will rot if exposed to too much direct soil contact. (Tomatoes are the only exception, check out this video about them!) The final step is to place your hands, palms down, one on each side of the plant and gently tamp the soil down around your freshly transplanted seedling. Pretend you’re kneading bread, for just three seconds! This helps reduce air pockets around the roots, increasing root to soil contact. With more nutrients more accessible, your seedling will thrive right away.
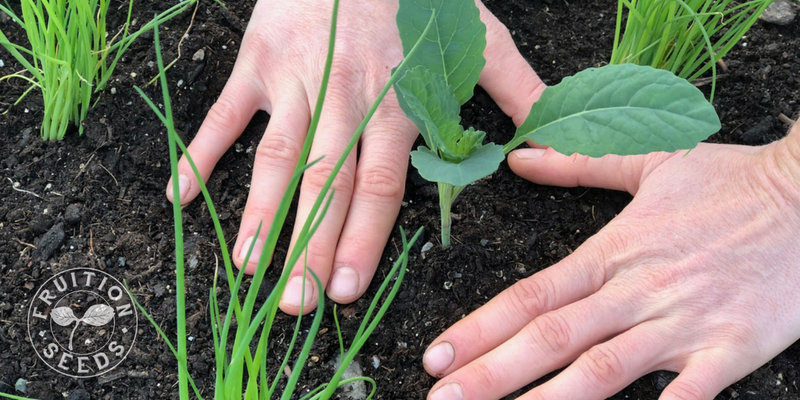
Great root to soil contact increases nutrient access and quick, healthy growth.
A Friendly Public Service Announcement About Peat/Cow Pots
If you’ve chosen to start transplants in peat or cow* pots, when planting them outside, be sure the entire pot is absolutely dripping, soaking wet. And be sure to bury every bit of that peat/cow pot, leaving no edge exposed to the air.
Several years ago, in a friend’s garden, we were observing her small, stunted pepper that wasn’t fruiting amid the rest of her glorious jungle of August abundance. No pernicious insects, no clear diseases. Down on my hands and knees, I finally discovered a tiny bit of an exposed peat pot. We dug up the plant and indeed, the peat pot had dried out and no roots had grown beyond its confines.
Sometimes, if soil has settled in the cow pot and I don’t want to bury the stem of my seedling, I simply tear off the top of the pot down to the level of the seedling soil. I’ll tuck these pieces in the hole and walk away confident my seedling will quickly grow out of its pot and indeed, the pot will soon become indistinguishable from the soil around it.
*Transplants started in soil blocks avoid this problem all together but if you aren’t able, cow pots (rather than peat pots) are made from sterilized cow manure which is significantly more renewable than peat.
Transplant Gallery
I’m such a visual person, so I find it endlessly useful to see healthy, unstressed transplants rather than read about them.
Gorgeously Healthy, Unstressed Transplants:
Your goal with any transplant is for it to be as short, stout and deep green as possible.
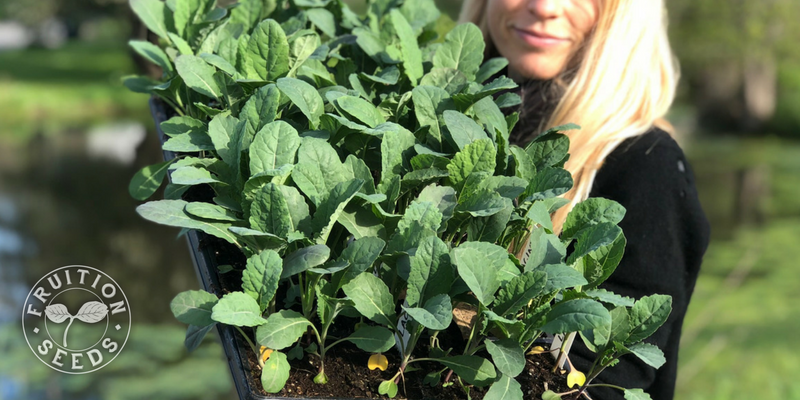
Note the yellowing cotyledons: this gorgeous Lacinato kale needs to be planted pronto!
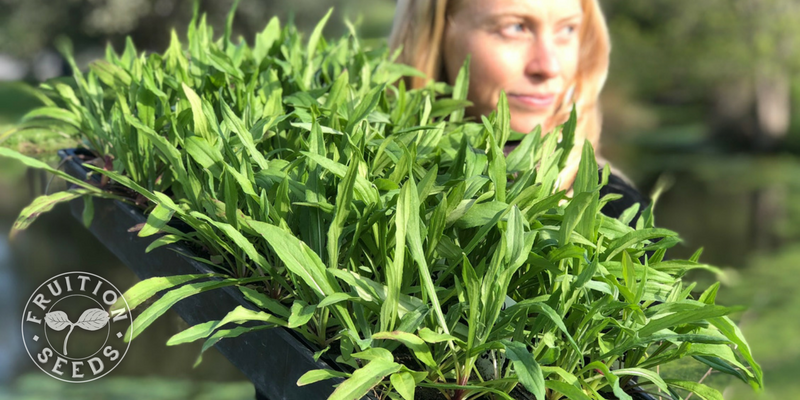
We love strawflower! These plants look healthy and take note… any plant that is flowering in its pot before transplanting is stressed. Avoid purchasing plants, especially vegetables, that are flowering in their transplant pots.
Unhealthy, Stressed Transplants:
Transplants that are stressed and unhealthy may be tall (leggy), leaning toward the light and pale yellow-green. If they’re too much of any one of these, it’s often best to not plant them, simply because they won’t surround you with nearly the abundance of a healthy seedling. Here are two stressed seedlings I would beg you not to plant:
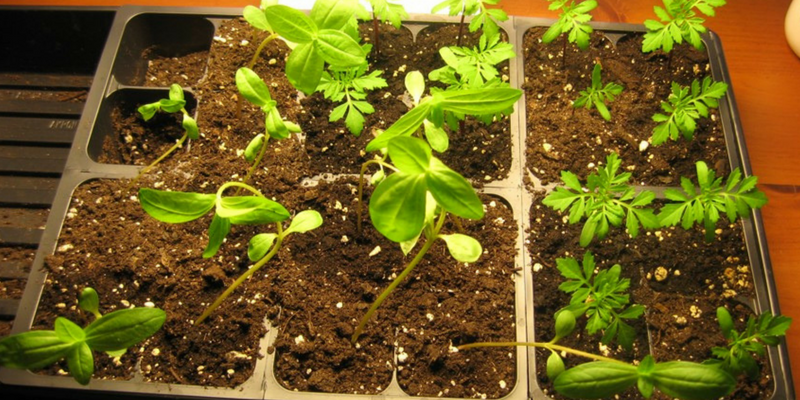
Tall, ‘leggy’ plants, like these zinnias, are stressed from too little light. Marigolds are more tolerant of mediocre light.
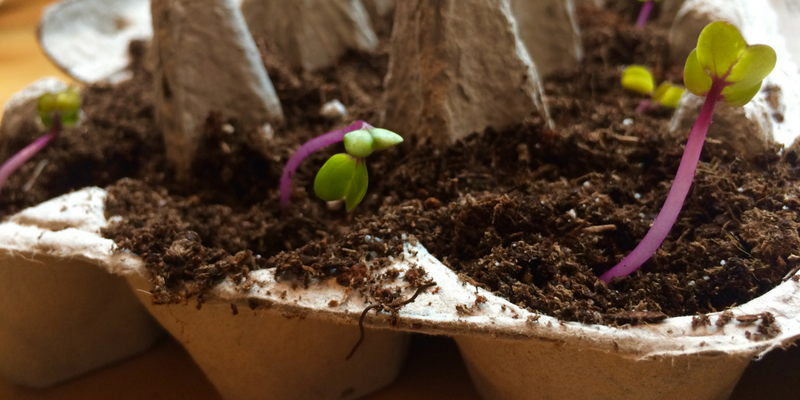
Egg cartons are great for eggs! Resist the cute pictures on Pinterest: egg cartons hold too little soil to grow healthy transplants and potting up is never clean from their curvaceous sides.
Happy Transplanting, Friends!
Sow Seeds & Sing Songs,

and the Many Beings of Fruition

Great article! Thank you so much for these amazing tips, I’ll definitely give this a try.
Liquid Carbon for Agriculture
Thanks. It’s good to know that I was already following your excellent guidelines! Now all I need is patience!!
i need to be away for 8 days ; can’t put tomato seedlings in yet I know(3 miles from lake ontario- ) my cherry embers are doing fantastically here inside….until we come home(gone 5/14-5/20), what do you think of the felt mats under plants to self water themselves) will that work well?
Thanks for reaching out and asking. I think it is deffinetlly worth trying. wishing you abundancer this growing season! <3