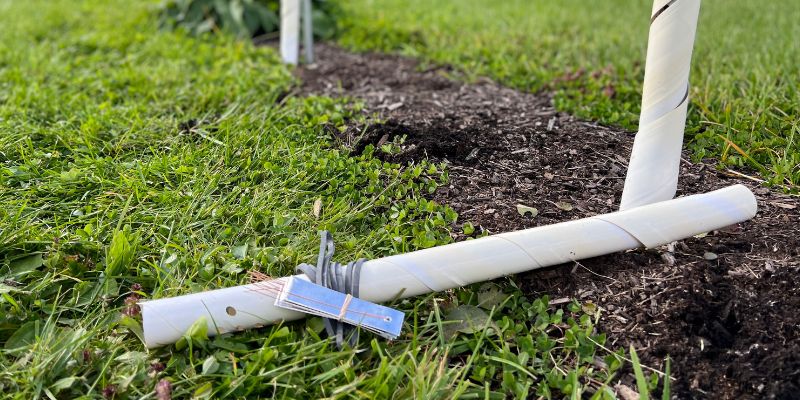
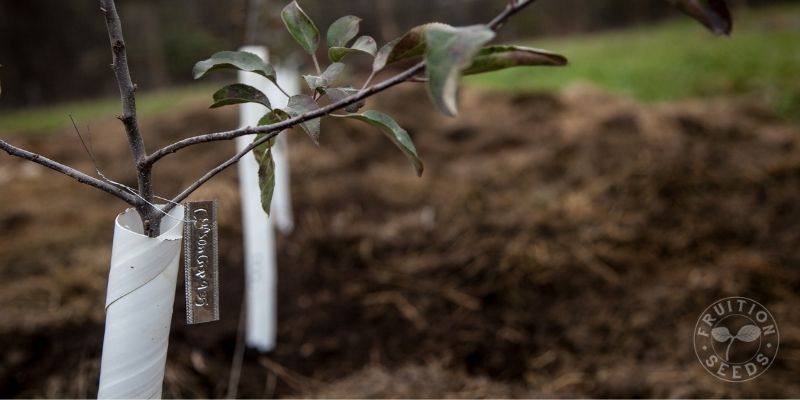
As leaves fall and nights turn chill, we’re accompanying our fruit trees in little ways that will make all the difference in the coming winter. Beyond a quality deer fence, protecting your lower trunk is key to prevent another common downfall of young trees: the munching mouths of mice, voles, rabbits and the occasional porcupine. Trunk protectors are simple to use and are often the difference between life and death: If enough of the bark is munched, the tree may be ‘girdled,’ preventing the flow of sap in spring, quickly killing the tree.
We plant spinach for our winter salads and sadly, your local rodentia will treat your tree’s nutritious cambium bark as a winter salad, so protection is everything!
If you’re looking for trunk protectors, we love to share what we love and here you are!
The trunk protectors we share cover the lowest three feet of young trees. Older trees with a wider diameter benefit from having two wrapped at their base to gain the protection. After 5 to 7 years, full size ‘standard’ tree bark thickens and mouse munchings are no longer possible, so trunk protectors are no longer necessary, though dwarf and semi-dwarf trees often benefit from trunk protectors throughout their lives. Also, if your winter snow accumulates higher than two feet, go higher: You’re protecting your trunk from the munchings of mice and voles who burrow in the snow, so if your snow is higher than your trunk protector, they will be thrilled to munch away.
When to Use Trunk Protectors
In most areas, the end of October through early November is the best time to wrap trunk protectors around your trees. Be sure your trunk protector is snug next to the ground and trim any low branches that may expose even a bit of your trunk below the top of the protector.
Other Ways to Protect Trees from Rodents in Winter
Snow shoeing, cross country skiing, and general tramping around, between and in the general area of your apple trees collapses the rodent snow paths & burrows, reducing potential tree damage…and it’s great exercise! Also consider dancing around the trees in Wassail season with friends ~
When to Remove Trunk Protectors
We’ll remove our trunk protectors in spring when all the snow has melted and the chance of snow has passed.
How Long Trunk Protectors Last
The trunk protectors we share will last many years, accompanying trees deep into their lives. Just be sure the dump trunk delivering mulch doesn’t run them over! As your tree grows in diameter, it’s best to wrap two trunk protectors so your tree has a full two feet of coverage.
2 Common Mistakes to Avoid with Trunk Protectors
Be sure to snug your trunk protectors right next to the ground, Friends:
And trim back any branches to the main trunk:
Pros & Cons of Different Trunk Protectors
Vinyl Spiral Wraps
So easy, effective and 3 feet tall, these are the Trunk Protectors we share in our Apple Abundance Kits.
Pros: There is no doubt that when time is limited, vinyl wraps are one of the best options for smaller trees. No tying necessary, just spiral them around the trunk in seconds. It’s hard to beat these guards in ease and efficiency.
Cons: They can trap heat and moisture around the trunk when left on in warmer temperatures. They also don’t last forever, eventually losing their twist, and ultimately ending up in the trash at some point. They’ll last at least 7 years or longer if removed each summer. Once trunks get over 3 inches in diameter, they become too small and an upgrade to a larger diameter guard will need to be made.

1/4” Metal Hardware Cloth
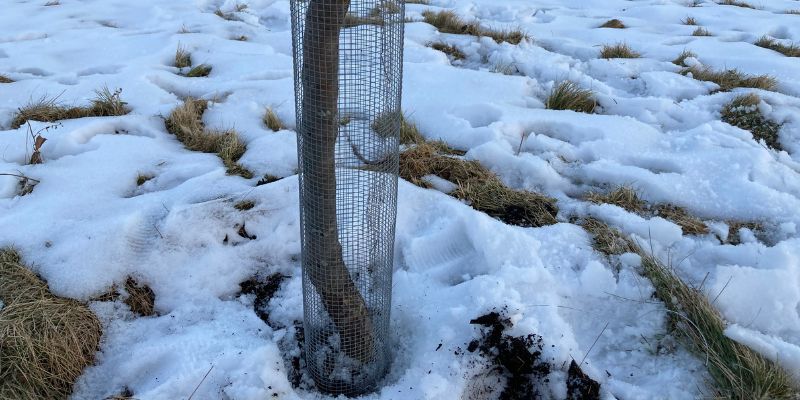
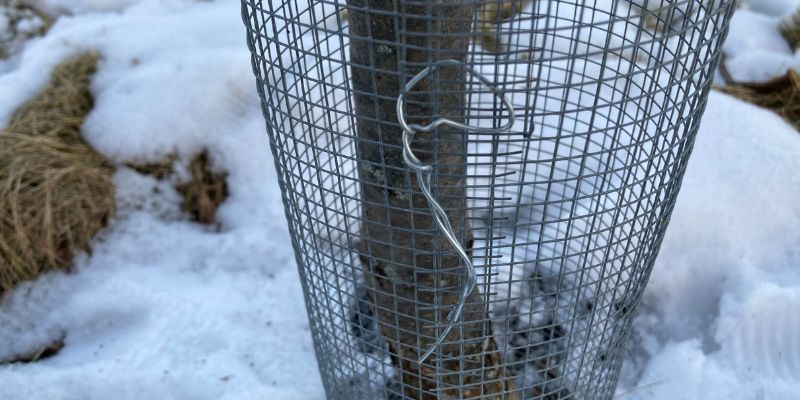
One of the most common home-made style rodent guards. See below for simple instructions on making long-lasting and durable hardware cloth rodent guards in just a few steps!
Pros: These home-made mouse guards last the longest and less likely to end up in a landfill than plastic. Hardware cloth is not cheap but can be used for many years without needing to be replaced. Guards can be custom made to fit different size trees. They allow air flow and visibility around the trunk, and can be left on through summer if regularly weeded and removed periodically to check for borers.
Cons: They take longer to put on than spiral wraps and their rigidness can be bulky and sharp. The sharp edge can rub against the tree if it is not anchored securely in the ground before it freezes.
½” Rigid Polyethylene Mesh
There are various types of UV resistant high-density plastic mesh guards sold by orchard suppliers, commonly seen in commercial orchards, especially on larger diameter trees. Orchard supply stores sell individual wraps, as well as rolls that can be cut up, bringing down the cost for larger orchards. Some require plastic zip ties and others are rigid enough that there is no tying necessary, making them quick and easy to put on and remove each year.
Pros: Many types of plastic mesh guards are quite durable and will last longer than vinyl spiral wraps. There is enough airflow that they can be left on year round, needing only periodic removal to check for borer.
Cons: Guards requiring ties require more time than vinyl spirals. They also tend to be more expensive, though there is quite a range in quality, price, and styles.
Metal Window Screen
One of our favorite DIY methods is reusing old window screen, which will hold up against rodents if, and only if, it is aluminum. Rodents will quickly and easily chew through a fiberglass screen so we make sure to only use metal. We usually wrap the screen around small diameter trees two or three times for a little added protection if there is enough slack. This is an especially great method to use if you just happen to have some old screen around that can no longer be used for windows, or someone is giving some away. We tie the screen on with wire, bungees, twine, string, rubber tree bands or whatever we have on hand. Different size trunks require different sizes. It’s a great method for larger trees that have outgrown white plastic spirals.
Pros: Screens are more flexible than hardware cloth, making them easier to handle with bare hands and fit snugly around bent or curved trunks. They also don’t have the sharp metal edge that hardware cloth does, making it less likely to scrape and damage the bark of the tree. If reusing an old screen, this method is cheap and perfect for those of us looking to make use of what is on hand.
Cons: Takes longer to tie on screens than plastic guards that spiral around trunks. Screens need to be removed in spring to check for borer because they don’t get as much airflow as hardware cloth or guards with larger mesh. Some orchardists will use screen guards to keep borer off trunks in summer but this is put on early summer and requires a slightly different procedure than putting on a mouse guard.

Corrugated Plastic Tubes
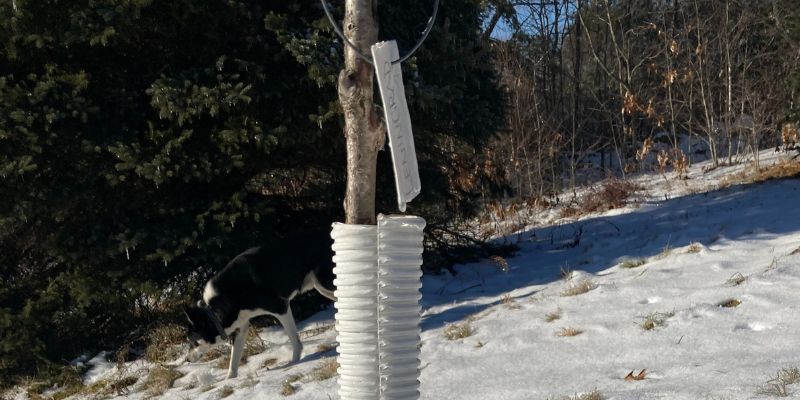
There are a few different types of plastic tubes available at orchard supply stores, often made from split loom tubing used for protecting wires. It is sliced down one side and can easily be spread open to wrap around the tree. Usually a 3 inch diameter or larger is necessary for young trees.
Pros: These are rugged and like spirals, fast and easy to put on and remove but likely have a longer lifespan than spirals that loosen up over time. They can be made at home from a roll or bought commercially as individual wraps.
Cons: They are made from plastic which may or may not be able to be recycled at the end of its life as a tree guard. This type is better suited for smaller diameter trees and doesn’t fit around those with larger trunks. Eventually they will need to be replaced for a guard with a larger diameter.
How to Make Your Own Hardware Cloth Trunk Protector
Materials Needed:
¼” Stainless Steel Woven Wire Mesh Hardware Cloth- 24″ wide roll
Wire Cutters or Wire Aviation Snips
18 Gauge Stainless Steel Wire (size can vary) OR Nylon zip ties OR Twist Ties
Step 1: Estimate the width of the roll needed, which is easiest if it’s the desired height for the guards. We recommend a 2 foot wide roll because there is little risk of hitting low branches, as sometimes happens when guards are 3 feet tall.
Step 2: Estimate the length of the roll by determining the circumference size for each guard, multiplied by the quantity of guards to be made. Guards can be custom made for different size trees. For the youngest trees, we recommend not making guards less than 18 inches wide, and when possible to do 24 inches or more. With a couple of inches of overlap, a hardware cloth cut to length of 18 inches will give a 5 inch diameter (see photo). It is better to go wider than this when possible. Most trees will quickly outgrow this size and need something larger. For a diameter of 7 inches across, and plenty of overlap, cut the cloth to 24 inches, giving the young tree sufficient space and reducing the potential of being scratched by the coarse edge of the guard in wind. The extra width allows guards to be reused year after year, as the trunks expand. Trees with a trunk diameter over a few inches wide will need guards cut to at least 30 inches wide, to create a guard with a diameter of at least 8 inches or more. Some orchardists prefer to not make them less than 36″ even for small trees, leaving plenty of growing space, and reducing the risk of ever scratching bark. If it’s difficult to estimate exactly how long a mouse guard should be to comfortably wrap around a tree, first circle the base of the tree with a flexible measuring tape to get a visual of the ideal circumference, adding on a couple inches for secure overlap.
Step 3: Purchase a roll of ¼” woven wire galvanized steel mesh at the hardware store.
Step 4: Roll out the hardware cloth and cut each guard with wire cutters or aviation snips to the desired length of 24 inches or more. Angle grinders can be helpful for those making a lot of guards, and can be used to smooth down the sharp edge.
Step 5: Another way we can dull the sharp top edge is to fold it over by an inch or so and tie it down onto itself. This is easiest if we lay the screen flat on the ground and fold over the top while it is laying flat. The fold will dull the top of the mouse guard, and should be placed on the outside, where it won’t rub on the tree. Taping the edge can also help blunt sharp edges.
Step 6: Wrap the guard around the tree and overlap the edges by an inch or more while straightening. Once it is straight, tie wire at the top and bottom of the overlap, and somewhere in the middle too, if a little extra security is needed. Use a thin galvanized steel wire, twist ties, or nylon self-locking zip ties. We tend to use a wire thickness around 18 gauge, but a variety of different sizes will work, as long as they are pliable and easy to twist. A stake can be placed on the inside of the guard and pounded down 4-five inches to improve stability and anchorage during winter winds so the guard doesn’t blow around. It is important that the bottom of the guard be buried a couple inches down into the soil, so that it freezes into place and remains stabilized through winter without rubbing against the bark. Always bury the sharpest, jagged edge under the soil when possible.
Well, that’s a Wrap!
You’ve got options, Friends! Whatever approach you choose, thank you for taking the time to love your trees and future generations by protecting them.
Though it can feel like just another chore on the list, we always find it sweet to slow down with trees and breathe. Look around. What birds are singing in fall when we put them on? What birds are singing as we take them off in spring? Relationship is one of the greatest gifts of life and sending love for all the ways trees nourish us beyond calories ~
Sow Seeds & Sing Songs,

& the whole Fruition crew
Be in the know:
Fruition's Fruit Tree Updates!
You'll receive seasonal tree insights & how-to's plus be the first to know about invitations to tree events on-farm and online!
Visit our newsletter website and subscribe to the 'Tree Updates' section
Enjoy our free online Apples & Organic Orcharding course and Tree Webinar Q&Qs Library in the meantime & don't be shy!
~When you join us, check your inbox for your welcome & access info! Stay tuned for our weekly organic gardening tips & inspiration, as well~

